It cooks faster, has crispy golden buttery skin, and your turkey is going to be so amazing it’s going to be remembered for years to come!!!
What you need to know
10 years ago, dry brining was still relatively unknown but these days it’s a pretty broadly known fact that dry brining yields superior results to wet brining as well as being far more practical. Because I want to arm you with everything you need to make the ultimate perfect roast turkey, this is a fairly long post, covering off on (hopefully!) all your questions. So starting off with a summary:
Summary:
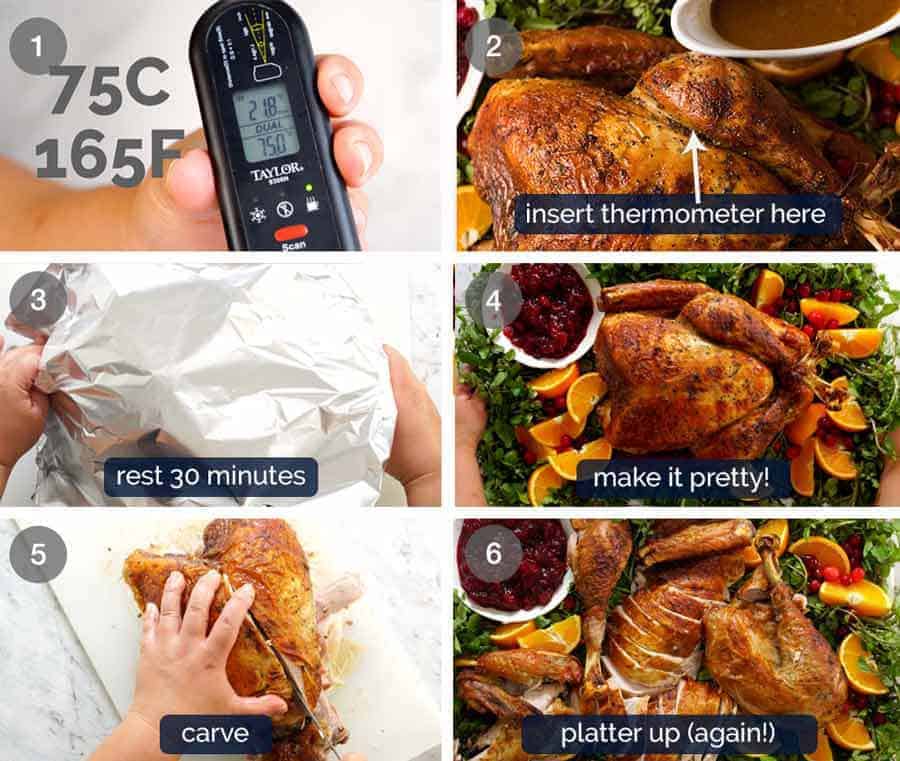
Brining is the path to moist turkey flesh Dry brining is far more practical and easier than wet brining Partially thawed turkey can be dry brined – handy! Brine time: 1 (bare minimum) 2 – 3 days (ideal) 4 days (extra day adds nothing) Works with turkey breast (2 days) Start turkey roast upside down for extra juicy breast Roast turkey cook time 12 minutes per 500g / 1 lb (brined turkey cooks faster) 75°C / 165°F using a meat thermometer inserted between leg and thigh 30 minutes resting essential! Served with turkey gravy or Cranberry Sauce
1 (bare minimum) 2 – 3 days (ideal) 4 days (extra day adds nothing)
Brining = JUICY Roast Turkey
I think we can all agree that there is nothing more devastating than labouring for hours over the Thanksgiving or Christmas table centrepiece only to find that it’s dry – especially the breast meat. Even drowning it in gravy can’t completely compensate.
What you Need To Know Brining is the path to JUICY Roast Turkey! Why Dry Brining is best Thawing times & methods Cook times Internal temperature of cooked turkey (and how to do it) How to make dry brined Juicy Roast Turkey How I Style the Turkey Platter How to Carve Turkey To Stuff or Not to Stuff? Cranberry Sauce or Gravy? Jump to Recipe
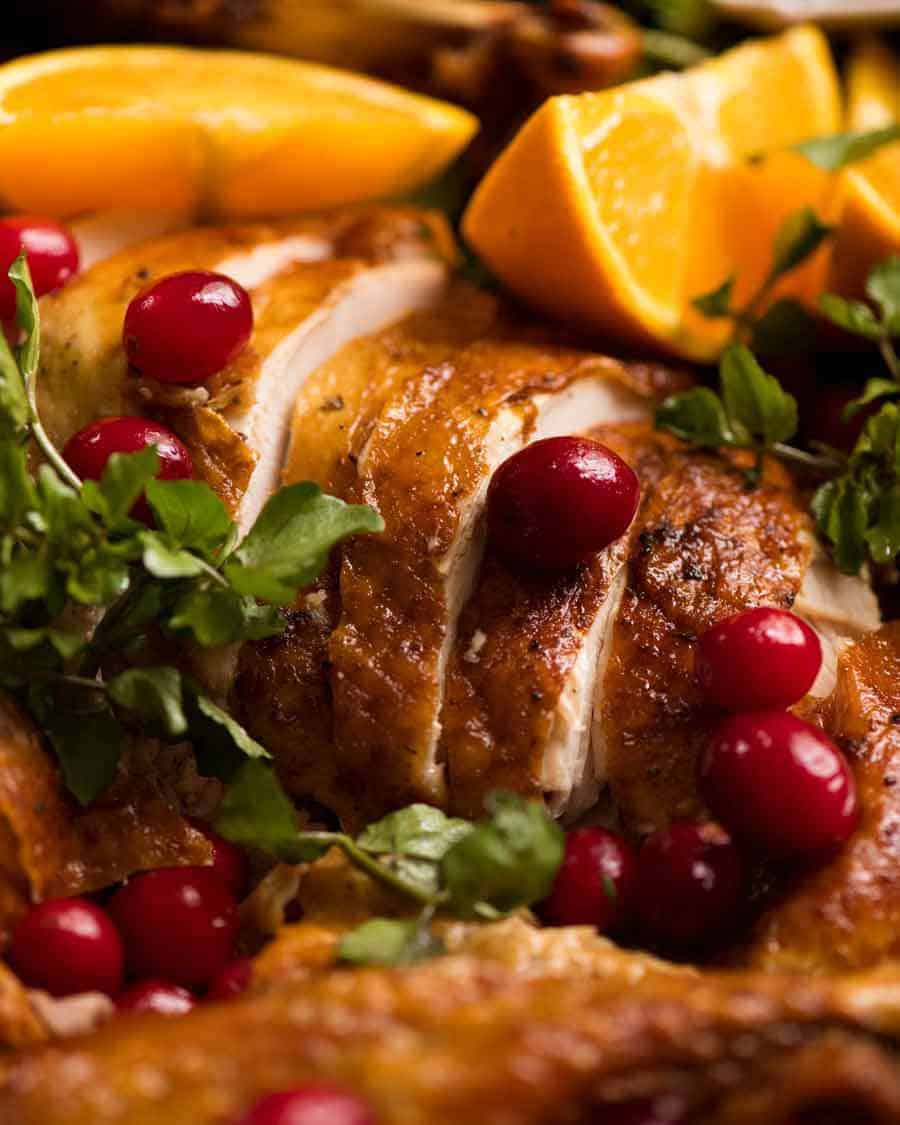
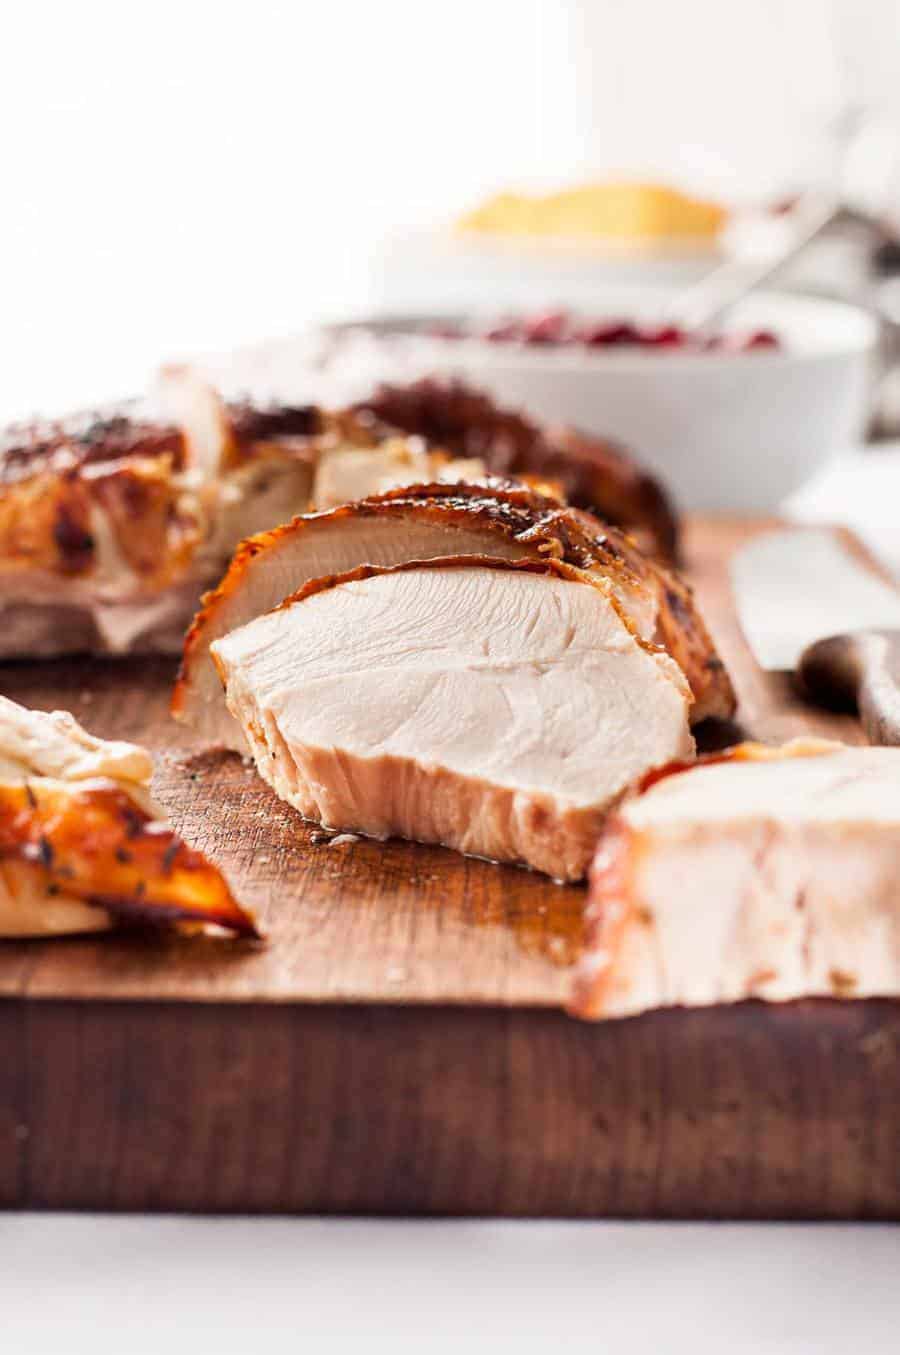
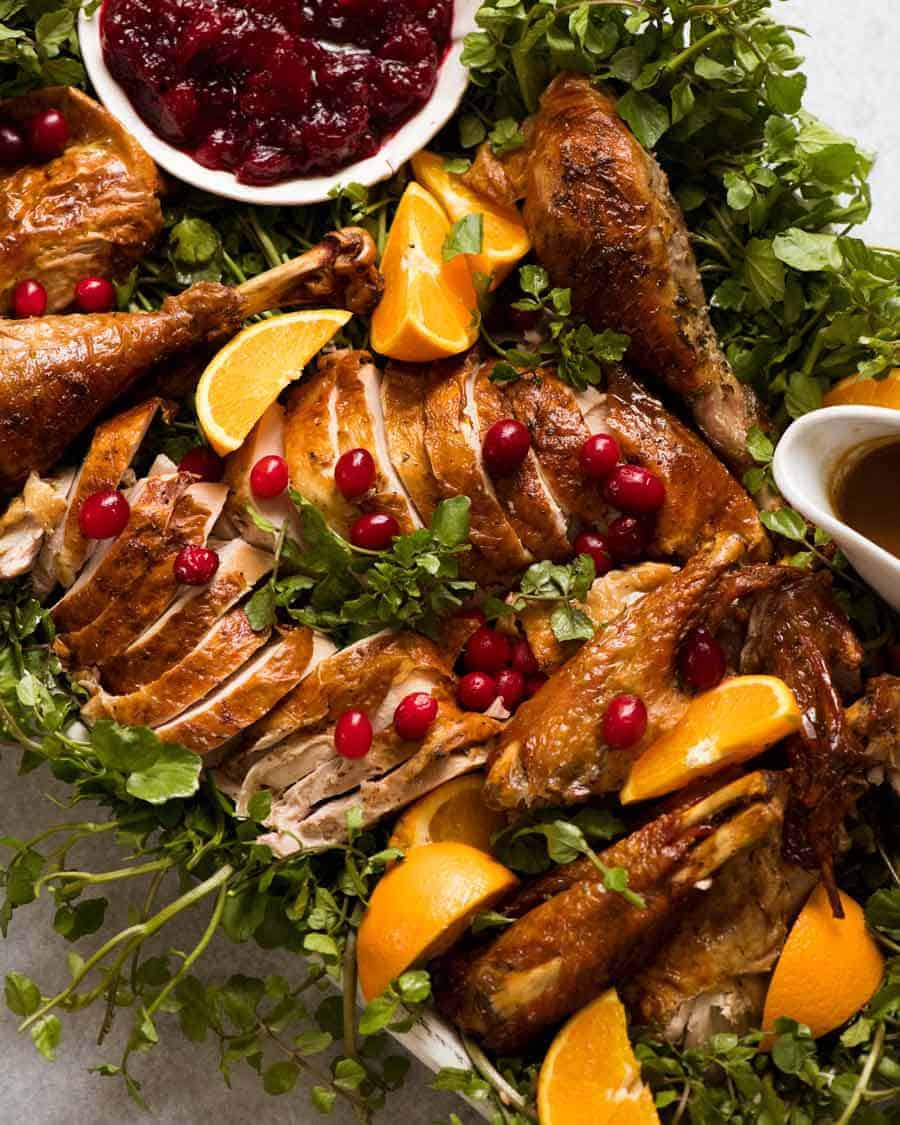
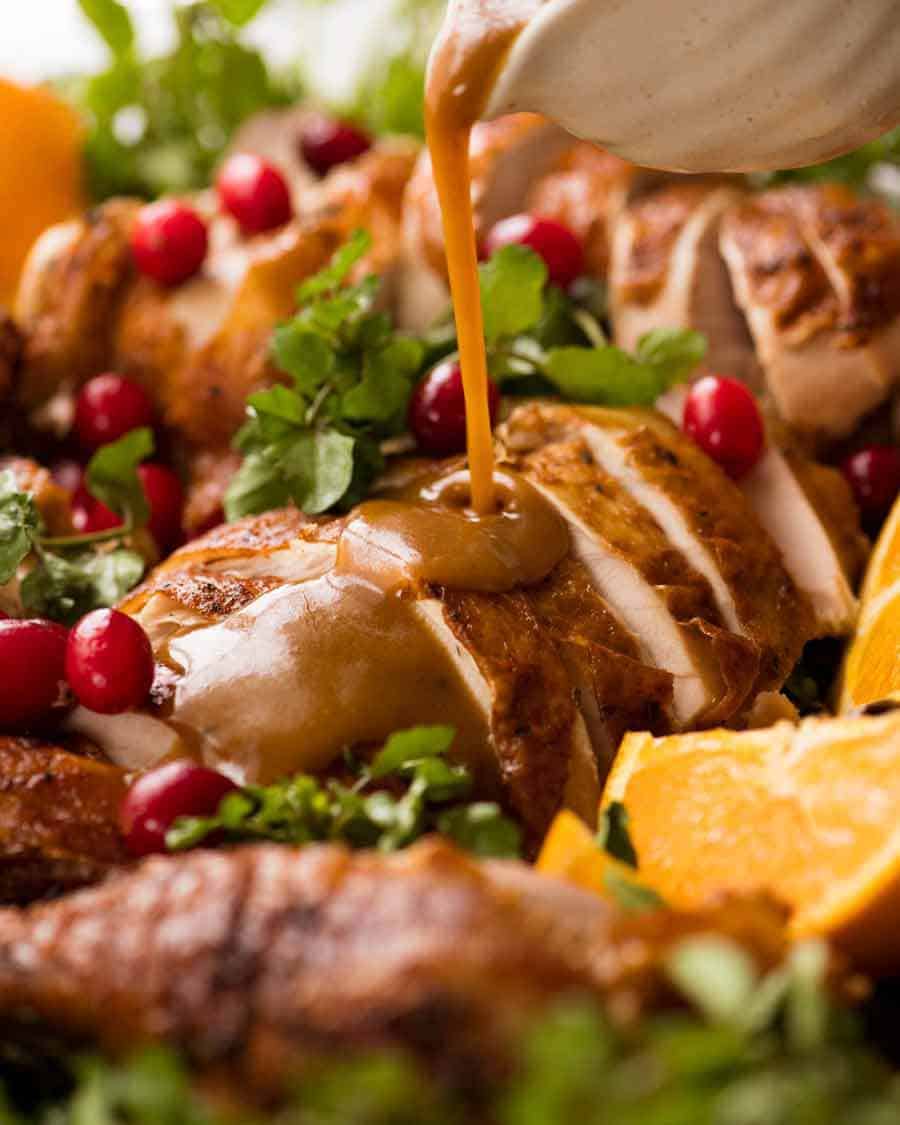
And in this day and age, there’s pretty much full consensus amongst all the greatest food authorities of the world that brining is the path to Juicy Roast Turkey. It doesn’t matter how much butter you use, whether you roast upside down, spin it around, baste 50 times – if you don’t brine, your turkey won’t be as moist. Full stop. End of story!! Take a close look at the turkey slice below – look how juicy it is!!!
What is brining?
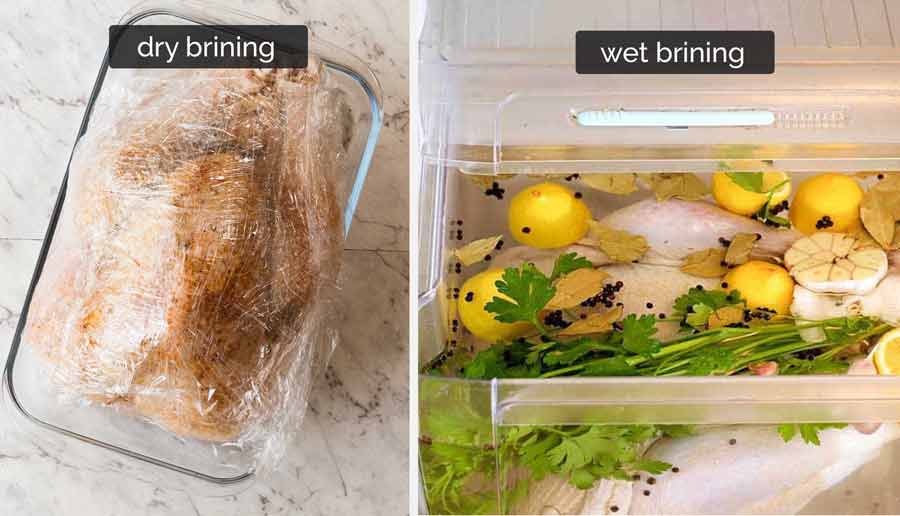
Brining is the method whereby meat (turkey, in this case) is soaked in a salty water mixed with aromatics like bay leaves, peppercorns and garlic for a couple of days. This has the effect of trapping moisture in the flesh while it roasts, yielding super juicy turkey. The method of soaking turkey in a giant bucket of salty water is called wet brining. Dry brining has the same effect, but is done by rubbing the turkey with a seasoned salt then left to “marinate” for a couple of days before roasting. Dry brining is easier, more effective and tastier than wet brining!
Why dry brining is best
Wet Brining is more well known than Dry Brining. While both methods will yield a juicy roast turkey, there are a number of very important advantages of dry brining:
- No mopping – I guarantee if you’re manhandling a bucket large enough for a 6 kg / 12 lb turkey AND bringing solution, there will be mopping involved at some stage…. Not to mention the question of whether your fridge has space for said bucket!! (Note: If you’re determined to wet brine, use your vegetable crisper! Genius idea from TheKitchn.)
- The turkey tastes like turkey. Not water. One of the grievances of wet brining is that while the turkey is moist, the moisture tastes bland – not like turkey. Which makes sense, right? The turkey sucks in the brine and unless it is heavily flavoured with broth, the turkey is sucking in largely flavourless liquid. Whereas with dry brining, the turkey releases its own juices then sucks its own juices back in. Turkey on turkey flavour!
- The roasting juices aren’t too salty to use for gravy. Another problem many people have with wet brined turkey is that the roasting juices can be too salty to use for gravy. You can compensate by plonking in raw potatoes into the gravy to suck out the salt, but….it’s just one more thing you can avoid by using dry brining!
- You can start brining while the turkey is still partially frozen. It takes 3 days – yes, 3 WHOLE days – to defrost a 10 pound / 5kg turkey in the fridge. Whereas with this recipe I’m sharing, I accelerate the partial defrosting of the turkey in cold water then it finishes defrosting WHILE it is brining.
- It roasts faster. It takes 1 hour 45 minutes to roast a 5.5 kg / 10 lb turkey. Compared to 2 1/2 hours for un-brined turkey.
Before we roast, we brine. And before we brine, we must thaw!
Turkey THAWING
A frozen turkey is a formidable block of ice that takes days to thaw. So you must factor this into your turkey-feasting timeline!
Thaw in fridge (long thaw) – allow 24 hours for every 1.5 – 2 kg / 3 – 4 lb of turkey (my 5.5 kg/11 lb turkey took 3 days) Fast thaw in water – 30 minutes per 500g / 1 lb. Turkey needs to be in a leak proof bag / wrapping. Submerge in large sink of water, keep it submerged. Change water every 30 minutes.
These are the cook times for a dry brined turkey (loosely stuffed with herbs and garlic) which cooks faster than un-brined turkey. Add an extra 15 – 20 minutes if your turkey is stuffed.
5kg / 10 lb: 1 hr 45 min – 2 hrs 6 kg / 12 lb: 2 hrs 15 min 7kg / 14 lb: 2 hrs 30 min 8 kg / 16 lb: 2 hrs 45min
This is the total roasting time, including initial 30 minutes at high temperature. It works out at around 12 minutes per 500g / 1 lb.
Internal temperature of cooked turkey
75C / 165F using a meat thermometer inserted between the leg and the breast (see photo below for point to insert). This is the USDA recommended internal cooked temperature of turkey. Take the temperature of the turkey straight out of the oven. Insert the thermometer between the leg and the breast. Insert straight down until you hit bone, then pull back a bit. Hold still until the temperature registers on your thermometer and stays at the internal temperatures specified above.
How to make juicy roast turkey
I promised you easy, and easy you shall have! Here’s a rundown on the recipe:
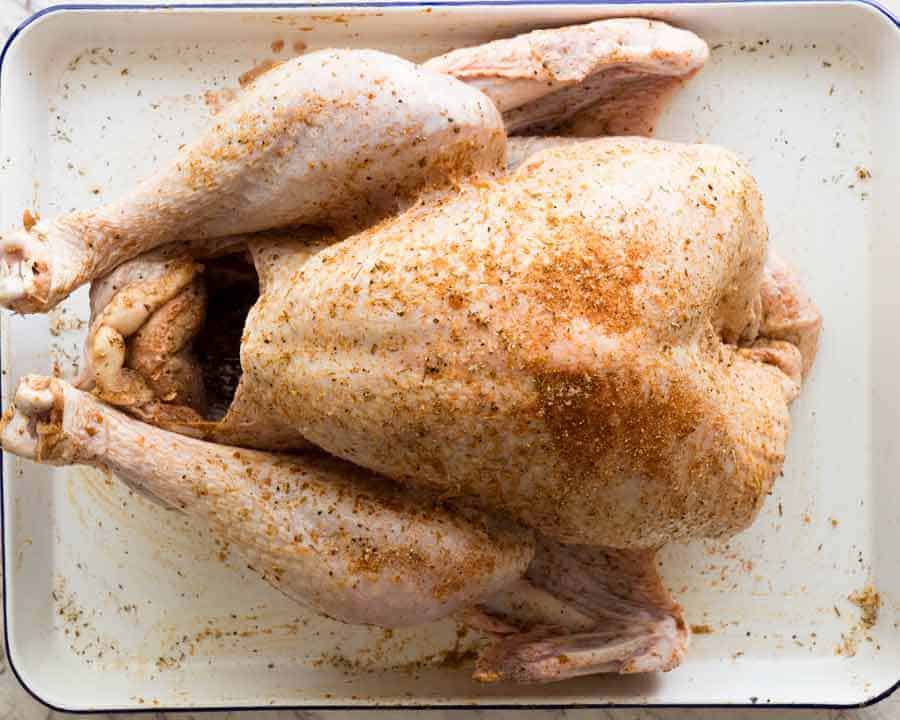
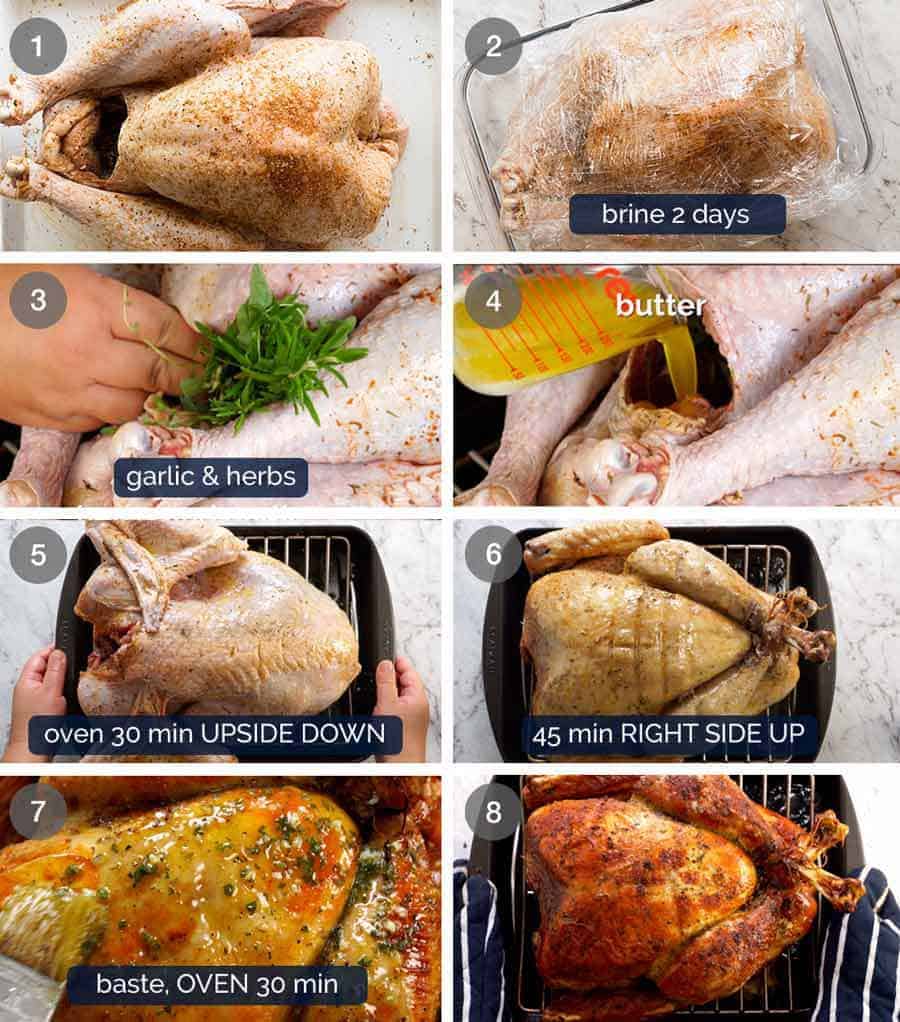
Rub with a simple seasoned salt mixture – salt, thyme, paprika, garlic powder and pepper; Wrap like a mummy in cling wrap (holds in all those juices!) and refrigerate for 2 days; Stuff with herbs, garlic and pour in a good slosh of butter; Slather with butter then roast upside down for 30 minutes (get those juices pooling in the breast); Roast right side up for 45 minutes; Baste with Garlic Herb Butter then roast for a further 30 minutes. (I do this at this stage to avoid burnt garlic-herb bits on the turkey)
When the internal temperature is reached (see section above), the most important thing to do is to rest the turkey for 30 minutes. This gives the turkey a chance to relax the fibres (ie more tender meat) and even more importantly, the juices get sucked back into the flesh (equals even juicier meat!).
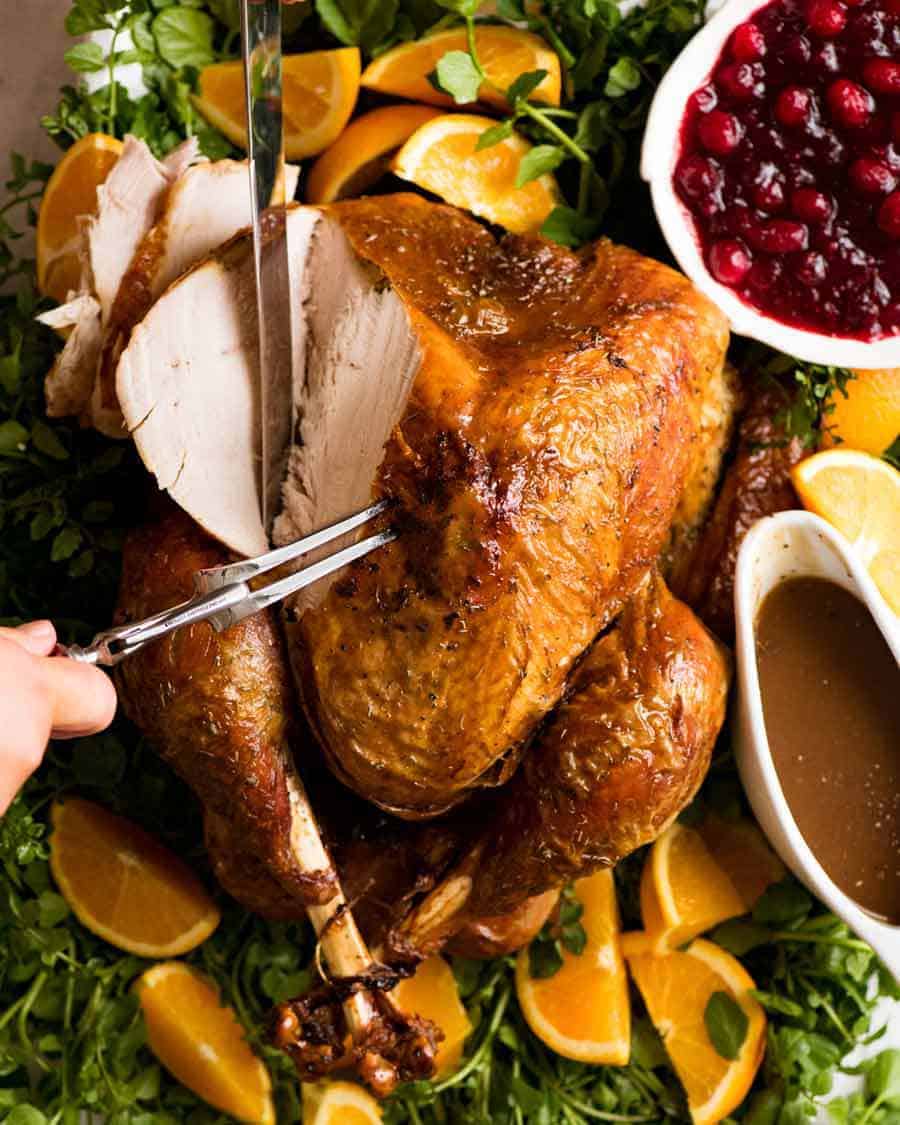
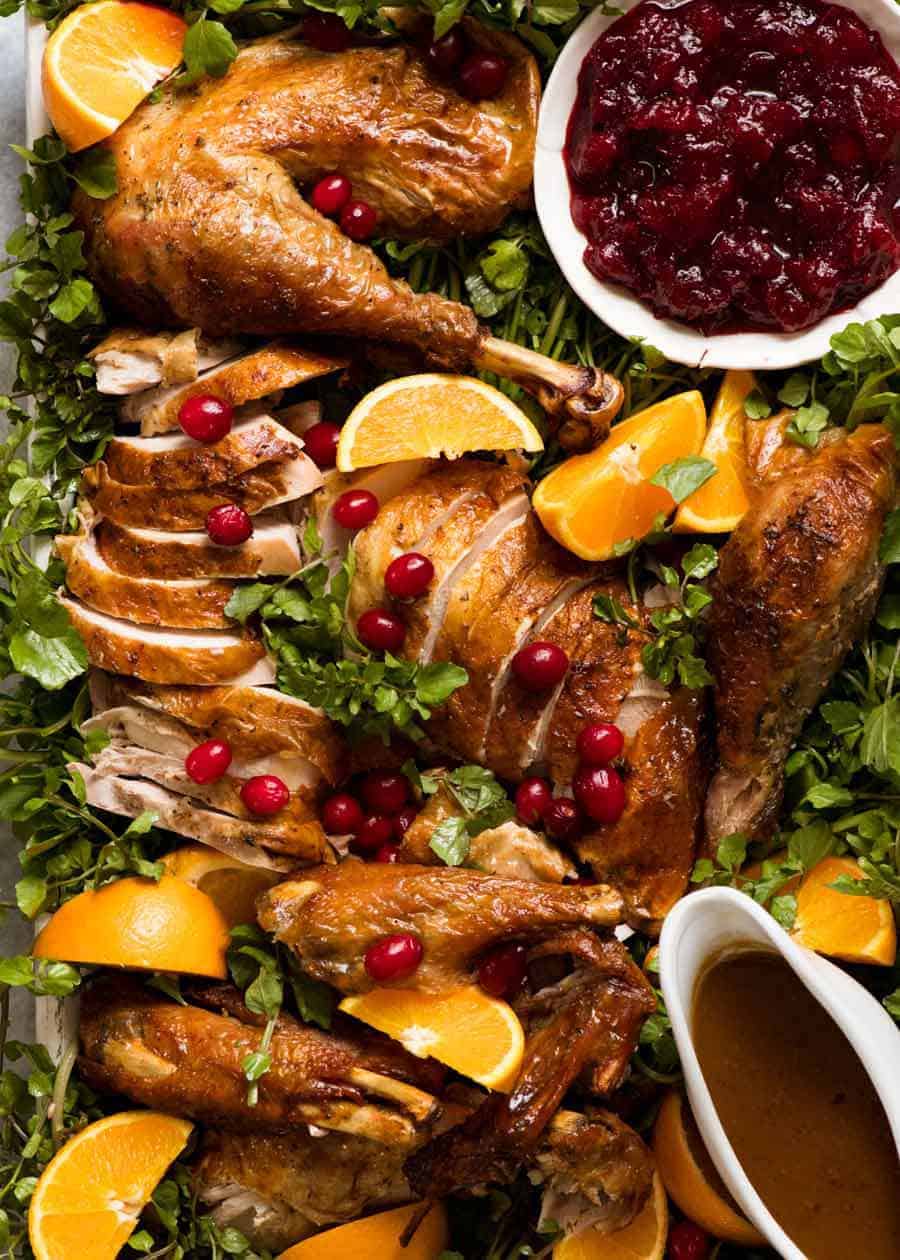
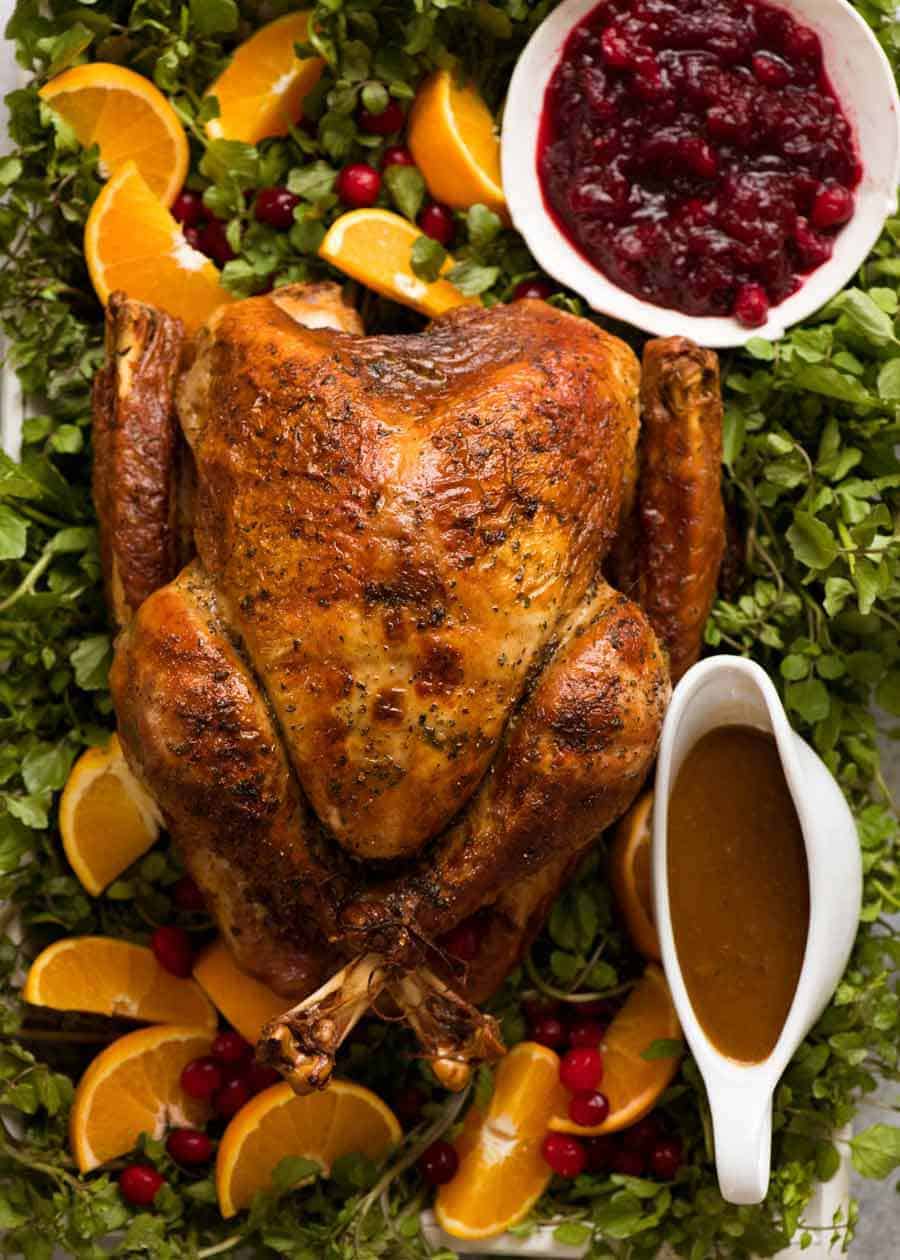
Styling the turkey platter
Even if the turkey is only on the platter for a fleeting moment before being whisked away to be carved, I still feel like it’s worth making a wee bit of an effort so the turkey can have it’s moment spotlight. While many opt for herb garnishes, I have a thing about making everything on a platter edible. So I create a bed of green leafage – watercress in this case (cheap, right shape, nice to “fan out” around edges) – with pops of colour from orange wedges (also for those creatures who like fruit with meat) and cranberries (thawed frozen ones).
How to Carve Turkey
I had ambitions to include a video of how to carve turkey, but doing such a video by yourself proved to be somewhat of a challenge. Turkey juice squirting everywhere, greasy hands, the challenge of new cameras and most frustrating, the hot breath of a fur ball under the table panting with excitement at the mere experience of being so close to such a giant hunk of meat. Said video was a total fail. Will attempt again next year. In the meantime – this video is a good tutorial. 🙂
To Stuff or Not to Stuff?
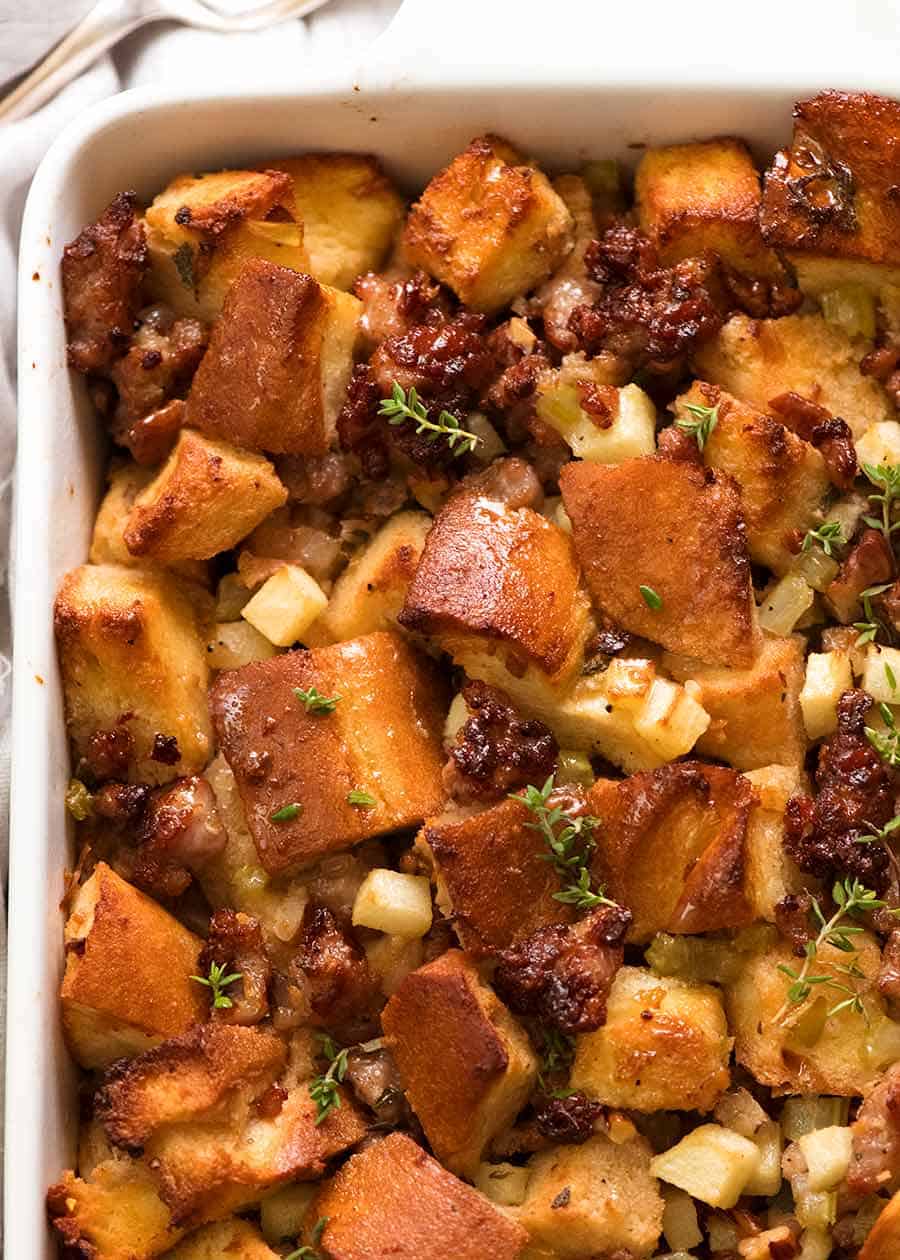
This turkey is not stuffed with stuffing, just with garlic, herbs and a good slosh of melted butter (which does all sorts of good things to the breast when roasted upside down). I do not stuff turkey because in order for the stuffing to be safe to eat, it needs to reach 75C / 165F – the same internal temperature of the turkey. The stuffing cooks last, so that means in order for the stuffing to be cooked enough to be safe enough to eat, the turkey is overcooked. No thanks! Besides, stuffing baked separately SO much more delicious – here’s my all time favourite Stuffing recipe!
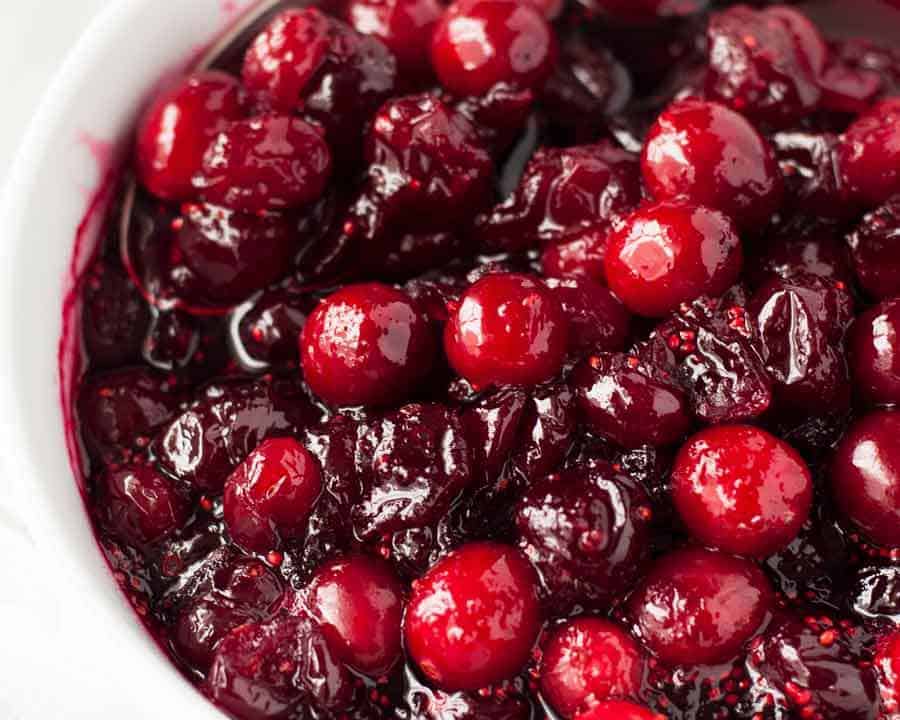
Cranberry Sauce or Gravy?
Why choose? Serve BOTH! Cranberry Sauce keeps for ages – make it well in advance. As for gravy…. it’s not an option around these parts. My view is that it’s criminal to to waste those pan juices and NOT make a gravy!
What to serve with Turkey
A classic centrepiece for holiday occasions like Thanksgiving and Christmas, here are my favourite sides to serve with turkey!
Thanksgiving sides for Turkey
Christmas sides for Turkey
So here’s my recipe for the Juicy Roast Turkey made by dry brining. It is based on this recipe from the LA Times which has a cult following – with good reason! I’ve added extra tips and tricks to help make this a breeze for you. I have a feeling this Thanksgiving is going to be your BEST EVER!!! – Nagi x
Watch how to make it
Here’s the recipe video for the Juicy Roast Turkey. See below for gravy!
And here’s the video for the turkey gravy:
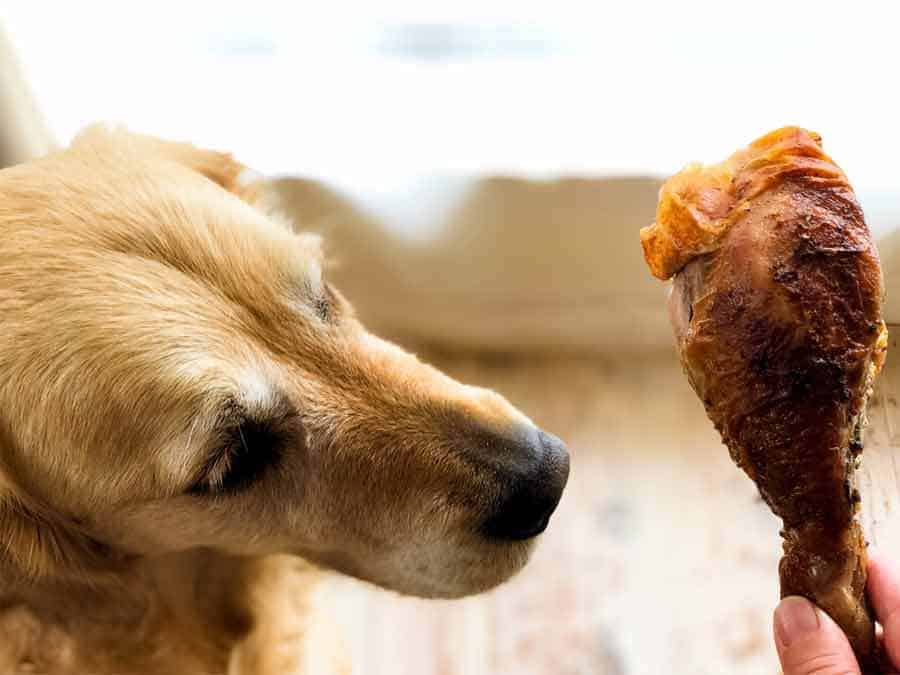
Life of Dozer
That turkey leg is the size of his head!
Add better flavour – Make the Herb Garlic Butter in this Roasted Turkey Breast but only use 1/4 of the salt. Scale the recipe to your turkey weight – click on servings and slide until the turkey weight changes to the weight of your turkey. (Yeah, it’ll be a lot of butter! You can scale down if you want 🙂 ). Watch the video to see how I loosen the skin, then slather about 2/3 of the butter under the skin. Flip turkey then rub just a bit of butter on the underside sprinkle with salt and pepper,. Roast per this recipe for 30 minutes on higher temp. Flip turkey right side up then slather skin with 1/2 of the remaining butter sprinkle with salt and pepper. Roast per this recipe for 45 min, then slather with remaining butter. Roast to finish cooking per this recipe. ,Voila!
SaveSave SaveSave SaveSave